
Step-by-Step Setup, Contact Import, and Pro Tips on How to Use WhatsApp on PC with BlueStacks
Wish you could chat on WhatsApp right from your PC? With BlueStacks, a free Android emulator, you can install and use WhatsApp on your Windows or macOS computer for a full-screen, keyboard-friendly experience.
This 2025 updated guide walks you through each step, from installing BlueStacks to importing your contacts—perfect for staying connected without juggling your phone.
What You’ll Need
✔️ A Windows PC or Mac meeting BlueStacks minimum requirements
✔️ BlueStacks Emulator – Download Here
✔️ Active WhatsApp account (or create new)
✔️ Internet connection
Step-by-step Guide
Step 1: Download and Install Bluestacks Whatsapp
- Go to BlueStacks Official Site and download the latest version.
- Run the installer (
.exeor.dmgfile) and follow on-screen prompts. - Once installed, launch BlueStacks—its home screen should appear.
Enable Virtualization in your BIOS for smoother performance.
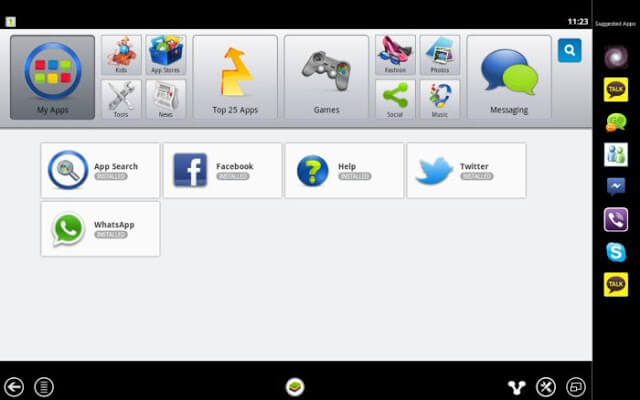
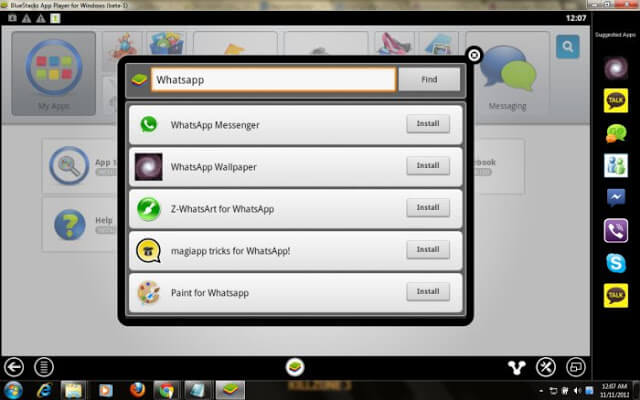
Step 2: Install WhatsApp on BlueStacks
- In BlueStacks, open Google Play Store or use the Search bar.
- Search for WhatsApp and click Install.
- Once installed, find WhatsApp on the BlueStacks home screen and launch it.
You should be greeted with the familiar welcome screen as seen in the screenshot below.
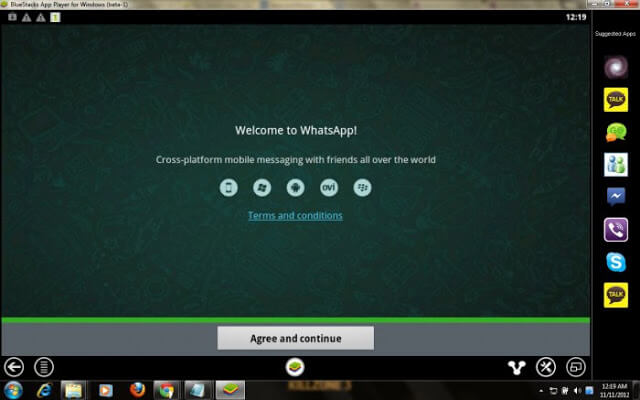
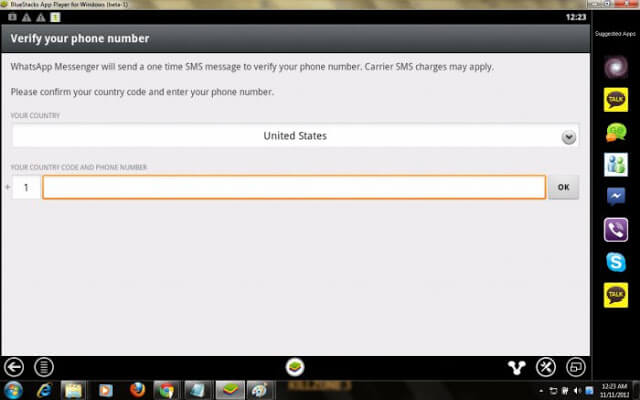
Step 3: Set Up WhatsApp
- Click Agree and Continue on the welcome screen.
- Select your country; your country code will populate automatically.
- Enter your phone number and verify it via SMS.
If using the same number as your phone, uninstall WhatsApp from your phone first. WhatsApp allows only one active session per number.
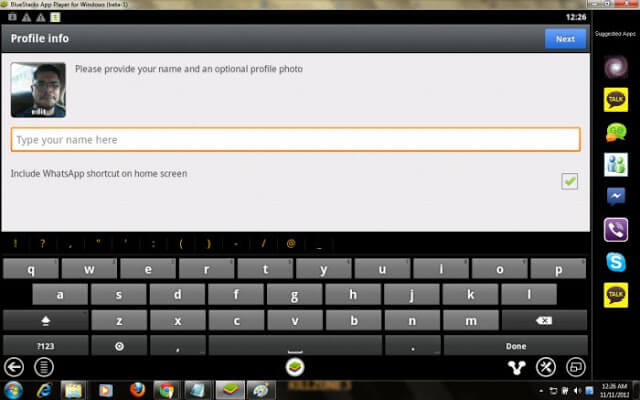
If you are using a phone number which has already been registered with WhatsApp in the past, it will automatically pick up your avatar image and default WhatsApp name. Add your name and click Next on the Top right of the screen.
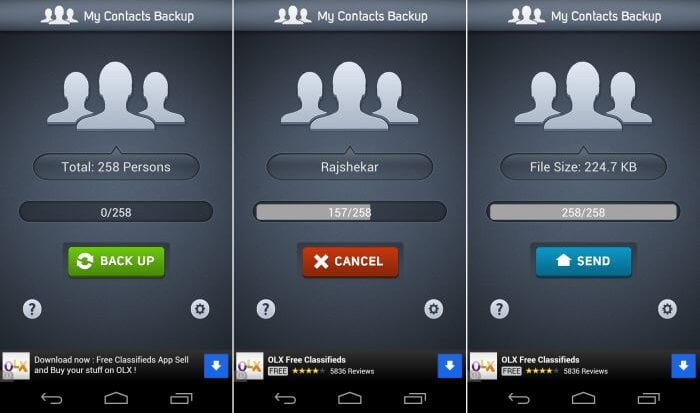
Step 4: Export Contacts from Your Phone
- On your Android phone, install MC Backup – My Contacts Backup from the Play Store.
- Launch it and tap Backup to generate a
.vcffile of your contacts. - Email the file to yourself and download it to your PC.
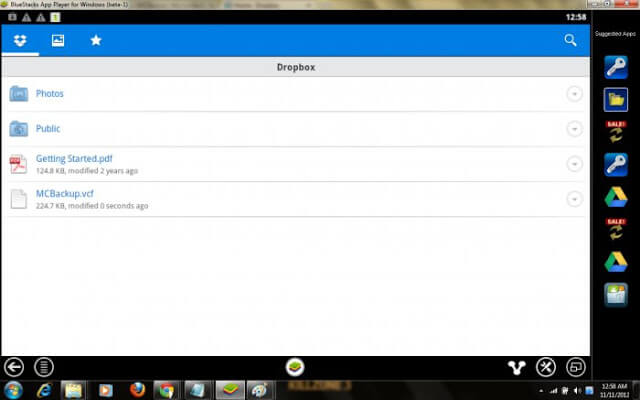
Step 5: Import Contacts into BlueStacks
- When prompted, save contacts to BlueStacks.
- Upload the
.vcffile to Dropbox (or Google Drive). - Install Dropbox inside BlueStacks, sign in, and download the
.vcffile.

- Enter your Dropbox login credentials and sign in.
- Click Next and then Skip when prompted on welcome screens.
- You will now see your main Dropbox dashboard with all your uploaded files.
- Locate the
MCBackup.vcffile you uploaded earlier and click it once to download into BlueStacks.
Step 6: Import Contacts into WhatsApp
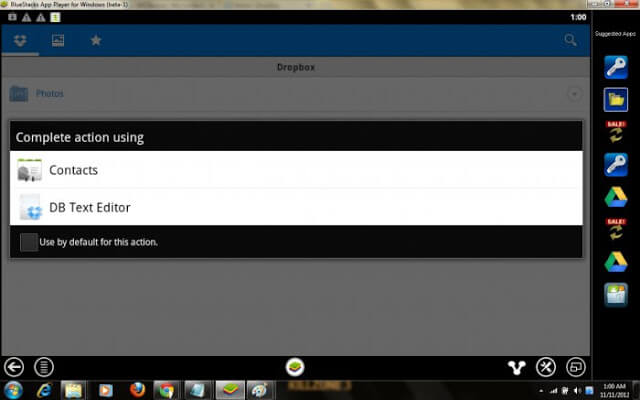
- Once the
.vcffile download finishes, BlueStacks will prompt you with an “Open with” dialog box. - Choose Contacts as the app to handle the file.
- Select the email account under which you want these contacts saved.
- BlueStacks will now start importing all contacts from the
.vcffile automatically.
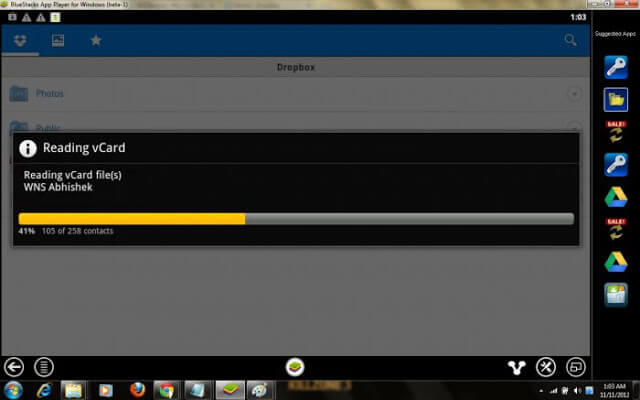
You should see a confirmation message once import is complete.
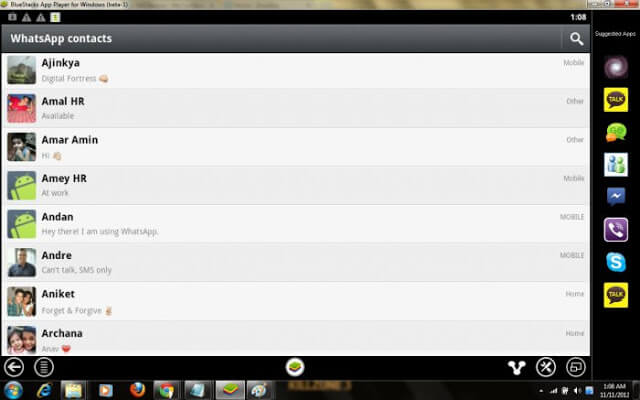
Step 7: Start Chatting on WhatsApp
- Return to BlueStacks home screen by clicking the Home button.
- Open WhatsApp from the app drawer.
- Tap the Pencil icon (new chat) at the top right corner.
- All your imported contacts should now be visible in WhatsApp. Start a chat by selecting any contact.
Pro Tips & Limitations
- Enable BlueStacks notifications for desktop alerts.
- Media sharing may be limited in emulated WhatsApp.
- Use BlueStacks Multi-Instance Manager to run multiple WhatsApp accounts.
FAQs
Can I use WhatsApp Web instead of BlueStacks?
Yes, but WhatsApp Web requires your phone to stay connected. BlueStacks runs WhatsApp natively on PC.
Is it safe to use WhatsApp in BlueStacks?
Yes, when downloaded from official sources.
If you liked this article, then please subscribe to our blog for more updates like this. You can also find us on Facebook, Instagram, Twitter, Pinterest, LinkedIn and YouTube.
